I have wanted to make something to keep all my tools in since my sister made me my
bagsket.
I got her to go to the place she got the material from and get me some more so that they would match. She also sent me some lining and some curtain interlining. What a lovely sister i have.
I thought I would start with a circular needle roll as they are the biggest pain and the biggest challenge in making the roll.
My sis pointed out
this blog to look at, and low and behold this lady had made one of her own. It was just as I wanted. So I copied it.
The one on
chocolateachuva’s blog has 12 pockets – 6 rows.
I currently have the following circs –
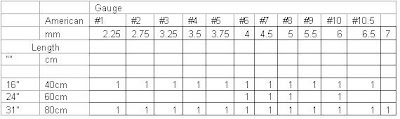
Even though what I have would fit in the 12 pockets – I wanted to leave some space just in case I got some more to fill in the gaps. So my pattern was for 7 columns - 14 pockets.

I decided that a pocket of 8cm wide and 13cm deep was enough to hold them.
This is the template I followed

I actually didn’t follow this exact template – I allowed less of a seem allowance, but found it difficult at times, especially as my cutting out wasn’t great – so I have added a bigger seam allowance to the above template to be sure.
I stuck lots of pieces of A4 together and cut out the above templates. If you are lazy like me – start with the biggest and you can keep cutting it down.
After cutting out all my pieces, I started by making the hems on the pockets.

For both pockets – I folded 1cm over and iron flat, then folded another cm over and iron flat – on the long edge.
This has now made the pocket 14cm x 58cm – the pocket will be 13 cm in total – the left over 1cm is for the bottom seem allowance.
I pinned this down and then sewed it down with a straight stitch.

After doing this for both pockets, I went on to pin the 3 main layers of the roll together. The outer , then the inner curtain interlining and finally the lining. The interlining and the lining are the same size and I started by pinning these flush together. Then I laid this on top of the outer layer and left a 2cm margin on all sides.

My sister suggested to use webbing to stick all these pieces together to avoid movement when sewing. I didn’t do this as I didn’t really want to wait more days and go to the shops. When I have something in my head, I just have to do it. But in hindsight, this would be a good plan, as this would keep it nice and flat and together when doing the rest of the stitching.
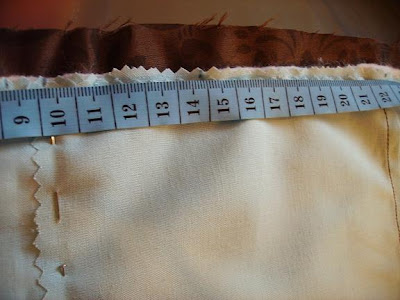
Next I took out the tape measure and marked the lining with the following measurements – on both sides.
– 1cm for hem
– 8cm for beginning of hem for 2nd row
– 9cm for beginning of 2nd row of pockets
– 14 cm for top of first pocket
– 22cm for top of 2nd pocket
I marked mine in pen as this was hidden later in the hem.
Next I pinned the middle pocket so that the top hemmed edge meets the mark I made at 22cm. I pinned it down entirely and make a straight stitch straight across at the 9cm mark - this leaves a 1cm hem below.
Next I layered the next pocket on- this sits flush with the bottom edge of the lining – and pinned it down.

Then I got the tape measure out again and made vertical pins at 8cm intervals (minus the 1cm each side for the seam. This showed me where to sew the pockets.
I re measured at several intervals to make sure that my pinned lines were straight and even from top to bottom and from left to right.
Then I sewed down these lines. From the top of the middle pocket down to the bottom edge. I left either side of the pockets and sewed these up later.
Next – I folded down 1cm of the outer material and ironed flat, and then folded over again for 1 cm and ironed that flat. This takes the outer material over the inner material by 1 cm making a nice seam – I sewed this all down with a machined straight stitch.
The only things left now are for the buttons to close it up – I tore my hair out for about 5 minutes thinking of what I could use to do this. Was thinking about plaiting some wool or something – but then I remembered I had bought some new hair bands and they were brown. So I used them. I measured out where they would need to go before sewing down the left hand seam. I placed them inside the seam (with the metal bit of the hair band inside the seam) and sewed them in.
Then for the next 10 minutes I was hunting around the house for 2 matching and somewhat related buttons to add on. Thankfully I had some spare off a coat that looked ok and I sewed them on.

It didn’t take to long to do – couple of hours. It took just as much time I think to sort out all the needles and put them in.
It’s not perfect – my machine sewing technique has never been the neatest. But it wasn’t a bad effort for me. :)
Thank you carol for being my material shopper and general question answerer. :)


