Tuesday, 20 August 2013
Freedom Microlite Seat Covers
Freedom Microlite Caravan
For the last few years we have been the camping with a camplet trailer tent but having been washed out one too many times last year, we have upgraded to a caravan.
We purchased a Freedom Microlite for a bargain price. Its 19 years old but in OK condition. One thing that needed doing right away was to make new covers for the seat cushions.
We have already taken out the dirty coloured carpet to reveal the original lino underneath.
It took a month of getting samples and travelling around fabric shops, but now we have chosen.
There wasn't much options out there and not much at all on offer in the shops.
I choose a teal coloured chenille material.
More pictures of the new covers to come.
Tuesday, 11 May 2010
Happy Birthday To Me :)
Look how clever she is :)
You can visit her blog on - http://postcards-and-stuff.blogspot.com/
Thanks a million Carol, they look great.


Wednesday, 21 October 2009
The Feelgood - Cabled Slouch Beanie
I have been busy knitting. I had a lovely customer ask for a cabled slouch beanie, so I came up with this....


It is also available via SnowHats pre made - SnowHats Snowboard Beanies
Sunday, 2 August 2009
How much do i LOVE Clover Pom Pom Makers?
Here are some examples of bobbles i have made with them. The pink ones are 65mm and the multi coloured one is 85mm. These are the perfect hat size pom poms, and they both come together in the pack. I am tempted however to purchase the smaller size ones also, as i could add them as decoration to my hats.


They are super easy to use.

continue to wind the yarn around the other 2 legs
 Wind the yarn until its approximately flush with the guide on the end of the feet.
Cut the yarn, close up the pom pom maker tighly and cut around the rim.

Cut a length of yarn and secure the pom pom by threading the yarn through the space between the blue disks.
Gently, pull the two sides apart.


I bought the two pom pom makers from ebay for £6.25 including postage. I think they are well worth the cost.
Saturday, 18 July 2009
YeeHaw
- I made the initial chain longer so the body of the hat would be longer.
- I changed the increases.
- I worked most of the hat in the round rather than joining at the end of the rows.
- I added extra rows for depth and width.
- I changed the increases for the brim as the increases indicated made the brim go hyperbolic!
Mouse Eared Hat

On my first attempt, I stupidly cut the pieces out with the stretch of the fabric going vertically rather than horizontally. Thankfully, I recut the pieces and all is now well.
Isn't she the cutest?
I need to go shopping now for more fleece colours.
Monday, 29 June 2009
Ikea Bags like Mine
I noticed that Novita is also making simmilar bags to what I have made recently.
I just love the colours. Go take a look.
Saturday, 27 June 2009
New Hand Bag
Saturday, 20 June 2009
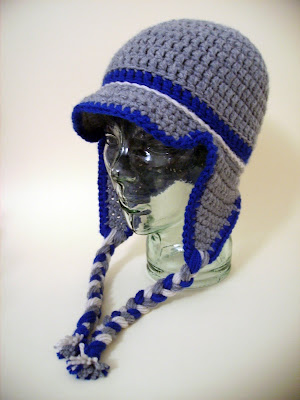
The Pacer - Beanie, Ear Flap & Visor
UPDATE: Pattern is now available from http://www.ravelry.com/patterns/library/the-pacer-beanie---ear-flap--visor


w~~60_57.JPG)


